

Stainless Steel Hex Socket Cap Screw Solutions for Durable and Secure Fastening
2026-09-28
In the world of heavy-duty assembly, a loose fastener isn’t just an annoyance—it’s a liability. Stainless steel hex socket cap screws offer the kind of bite and corrosion resistance that keeps critical joints locked under stress. At Wanluo, we’ve refined these fasteners into a complete solution for engineers and builders who refuse to compromise on durability or security. Here’s what makes them worth a closer look.
What Actually Happens When a Hex Socket Screw Backs Out
A hex socket screw doesn’t just spin loose the moment you look away. The backing-out process usually starts with a quiet loss of clamping force. Even a properly torqued fastener settles, and when external loads or vibration act on the joint, microscopic sliding occurs between the thread flanks and under the screw head. This motion wears away the tiny surface asperities that provide friction, allowing the preload to bleed off little by little.
Once the residual preload falls below the point where friction can hold the threads together, the screw becomes vulnerable to self-loosening. Transverse vibrations are particularly effective at this: the alternating side-to-side movement makes the screw rotate relative to the nut or tapped hole, often in the loosening direction because the thread helix is inclined. The hex socket itself doesn’t resist this rotation—it only provides a way to apply and remove torque, so its drive feature plays no role in preventing back-out.
As the screw continues to rotate, the clamped parts lose contact pressure, and the joint can open slightly under service loads. This invites further movement, fatigue, and in the worst case, complete disengagement of the fastener. What remains in the hole is often a hex socket with rounded corners or a damaged thread, a silent record of the slow mechanical escape that took place over thousands of load cycles.
Picking the Right Passivation for Outdoor Structures
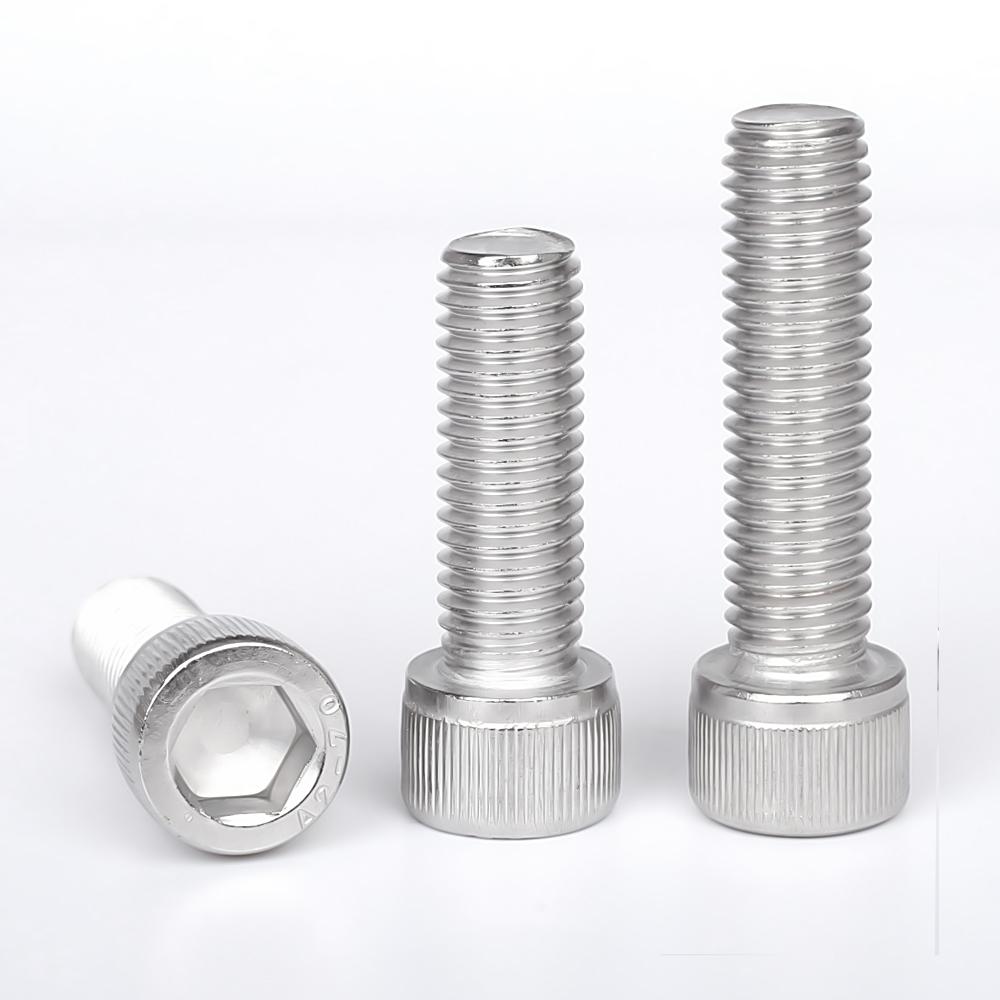
Outdoor structures face everything from coastal salt spray to industrial fallout, so passivation isn't a one-size-fits-all step. The alloy composition determines which bath chemistry actually works. For 304 and 316 stainless, citric acid passivation delivers a cleaner, safer result than traditional nitric acid, and it performs just as well in salt fog tests—without the toxic fumes or disposal headaches. If the structure includes free-machining grades or has welded zones, you may need a different acid blend or a two-step process to avoid flash rust.
Consider the microclimate where the structure will live. A beachfront railing endures chloride exposure that demands a thicker, more uniform chromium oxide layer, so you might specify a longer immersion time and higher temperature. Inland structures with acid rain or de-icing salts have their own demands—often less about duration and more about removing every trace of iron contamination from fabrication. Test coupons under conditions that mimic the actual exposure, not just a generic ASTM A967 practice.
Don't overlook the human factor. Citric acid is friendlier to workers and the surrounding landscaping, which matters when passivating in place. But if you're restoring an older structure, verify the existing surface condition first; polishing or pickling before passivation can make or break the final corrosion resistance. A quick water-break test after rinsing tells you more than any certification sheet.
Torque Wrench Myths That Lead to Loose Joints
One persistent myth is that a torque wrench reading past the click means the joint is automatically safe. In reality, the click only signals that the set torque has been reached at the fastener head, not that the entire joint assembly has achieved proper preload. Factors like thread friction, surface contamination, and gasket compression can cause the actual clamping force to be far lower than expected. Technicians who trust the click blindly often leave joints that loosen under service vibration or thermal cycling.
Another widespread belief is that using thread locker or anti-seize eliminates the need for accurate torque control. While these compounds change the friction coefficient at the threads, they do not replace the need for a calibrated torque procedure. Applying thread locker to a bolt and then torquing to the dry specification can lead to overtightening or, paradoxically, under-tightening if the lubricant effect is strong. Over time, either condition can cause the joint to lose clamping force and work loose.
Finally, many assume that a torque wrench stored at its lowest setting remains accurate indefinitely. However, internal spring fatigue and loss of lubrication can shift calibration silently. The wrench may still click, but the delivered torque drifts lower, leaving joints under-tightened. Regular recalibration and storing the tool at its mid-range setting are essential habits. Ignoring them turns a precision instrument into a consistent source of loose fasteners.
The Case for Deep Sockets in Confined Spaces
When a bolt sits deep inside a recessed bore, a standard socket often can't reach the fastener's head without the ratchet body hitting surrounding components. Deep sockets solve this by extending the gripping area, letting you get a positive purchase on fasteners tucked behind brackets, under manifolds, or inside spark plug tubes.
In tight engine bays, using a shallow socket with multiple extensions can introduce wobble and reduce the feel you need to avoid rounding off a stubborn nut. A deep socket keeps the tool's pivot point closer to the fastener, which means more of your turning force goes directly into the bolt instead of being lost to flex.
There's also a practical side: a deep socket can double as a slim-profile holder for starting fasteners in places where your fingers won't fit. The extra depth lets you press a nut or bolt into position and turn it without dropping it into an inaccessible area, saving real time on jobs like bellhousing bolts or recessed suspension hardware.
Reading Failure Marks on Used Stainless Cap Screws
When examining stainless cap screws pulled from service, the failure marks rarely tell a simple story. A single fracture surface can carry evidence of multiple loading modes—torsional shear near the thread roots, tensile overload across the core, and fretting scars from micro-movement under clamp load. Start by checking the shank just below the head. If you see crescent-shaped galling or a spiral smearing pattern, the screw was likely driven past yield during installation, and the head may have been cocked in the counterbore. These marks are easy to miss under shop lighting, so use a low-angle raking light or a 10x loupe.
On the threaded portion, pay attention to the crests and flanks. Bright, polished bands on one side of the thread indicate uneven bearing contact—common when a cap screw is reused in a tapped hole with slightly oversized or misaligned threads. Over time, this one-sided contact work-hardens the stainless surface, creating a brittle zone that can crack under repeated thermal cycling. If you find fine, parallel scratches running along the thread axis, that is a classic sign of debris being dragged during removal, not a pre-existing failure mark. Compare them to the helical tool marks left by thread rolling to avoid misreading the history.
Finally, look at the fracture face itself. For austenitic stainless cap screws, a cup-and-cone break with a dull fibrous center usually points to ductile overload from a single event—like a seized joint being forced apart. In contrast, a flat, granular fracture with ratchet marks around the perimeter indicates fatigue, often originating at a corrosion pit or a stress riser at the underhead fillet. If the surface shows beach marks with a rust-colored tinge despite the stainless base, the screw saw cyclic loading in a chloride-rich environment, which accelerates crack growth. Cross-reference these visual clues with the torque records and the mating part condition, because a used cap screw rarely fails from just one cause—the marks accumulate over its entire service life.
Why Some Stainless Fasteners Gall and How to Stop It
Stainless steel fasteners are prone to galling because their protective oxide layer can be scraped away under pressure and sliding contact. Once the base metal is exposed, microscopic high points on the threads weld together under friction. This is not a defect in the material itself; it's a mechanical reaction driven by the softness and high ductility of common austenitic grades like 304 and 316. The harder you tighten, the more heat and cold welding occurs, often locking the nut and bolt together permanently before you reach target torque.
Prevention starts with slowing down and reducing friction. Using a quality anti-seize lubricant or a specialized galling-resistant coating is the most direct fix. Even a small reduction in installation speed helps, as heat is a major trigger. If the joint design allows, consider using different stainless alloys for the nut and bolt, such as pairing a 316 bolt with a 304 nut; dissimilar hardness reduces the chance of adhesion. Rolled threads also perform better than cut threads because they have smoother flanks and fewer sharp peaks.
When galling still occurs, the usual response is to cut the fastener out, but there is a cheaper first step: loosen slightly, then apply penetrating oil and work the fastener back and forth with very short strokes. This can sometimes break the micro-welds without snapping the bolt. For production environments, torque-controlled drivers with a slow final seating speed are far less likely to gall than hand tools or high-speed impacts.
FAQ
They combine a recessed drive that resists cam-out with the corrosion resistance of stainless steel, so joints stay tight without rust streaks or rounded heads over time.
A2 (304) works well for general indoor and mild outdoor use; A4 (316) adds molybdenum for better resistance in marine or chemical environments. Match the grade to the exposure level and tensile needs.
Yes, the deep hex socket allows higher tightening torque, which helps maintain clamp load. Pairing them with locking washers or threadlocker can further reduce loosening under vibration.
They are primarily intended for metal-to-metal fastening, but with proper pilot holes or threaded inserts they can work in dense plastics and hardwoods. Avoid relying on thread cutting in soft materials.
Use a suitable anti-seize compound, slow down installation speed, and avoid over-tightening with power tools. Cleaning threads before assembly also reduces friction that leads to galling.
Socket cap screws have a cylindrical head with an internal hex, saving space and allowing access in recessed areas. Hex bolts use an external wrench head, which requires more clearance but can handle higher torque in some cases.
Generally no, but in harsh environments periodic inspection for crevice corrosion and re-torquing critical joints is smart. Light cleaning with fresh water can remove salt deposits in marine settings.
Standard socket cap, low head, and button head versions are common, with coarse or fine threads depending on the standard. Metric and imperial sizes are both widely stocked.
Conclusion
A hex socket cap screw that loosens on its own rarely fails from a single obvious cause. What you see as backing out often starts long before the first turn, a dry thread run at high speed, a driver bit with rounded corners, or a torque wrench that has not been checked in years can all leave a joint just under the real clamp load. The socket itself hides early deformation, so by the time you notice wobble, the screw may already be ruined. Reading failure marks on used stainless cap screws gives you the history no spec sheet will. Galling scratches near the thread roots, a polished ring under the head from micro-motion, or a necked-down shank each point to a different fix. If a joint keeps coming loose, replacing the same size and grade without changing the install process is just repeating the mistake.
For outdoor structures, picking the right passivation treatment can outweigh the difference between 304 and 316 in many real-world cases. A well-passivated screw sheds chlorides far longer, while a poorly treated one collects rust in the hex recess and along thread crests. When you work in confined spaces, a deep socket that fully engages the hex is not optional. Shallow engagement is exactly how corners strip and then the wrench slips. And the old problem of stainless fasteners galling under load is avoidable if you slow the installation speed, use a high-pressure anti-seize on the threads, and never reuse a bolt that has already started to seize halfway in. Secure fastening is not about one magic trick but the sum of these small, deliberate choices.
Contact Us
Contact Person: Shane
Email: [email protected]
Tel/WhatsApp: 8613357785029
Website: https://www.wanluohardware.com