

Lightning Strike Current Sensor Original Manufacturer Guide to Reliable Performance
2026-08-25
What separates a lightning strike current sensor that survives a direct hit from one that silently drifts out of spec? Not what most datasheets tell you. As the original manufacturer behind Xiasen sensors, we wrote this guide around field failure data and real-world testing—not marketing bullet points. If you're tired of swapping out sensors after every storm season, the next few minutes will change how you evaluate every spec on your shortlist.
What a Direct Strike Does to Sensor Inputs
A direct strike overwhelms the sensor front end in ways that gradual wear or electrical noise never do. The first casualty is usually the analog input stage, where the sheer energy of the impact causes clipping, saturation, or outright destruction of the protection diodes. This isn't a subtle shift in calibration—it's a sudden loss of meaningful signal, leaving the sensor blind to everything except the brute force of the event itself.
Beyond the immediate electrical damage, mechanical shock travels through the housing and into the sensing element. For piezo-based or MEMS devices, this can fracture the crystal structure or delaminate bonded layers. The result is a permanent change in sensitivity and a shift in the baseline offset. Some sensors will still respond, but their readings become unreliable, spiking unpredictably even when the system is at rest.
Then there is the firmware side. When a strike hits, the embedded processing chain sees a wild excursion far outside expected bounds. Depending on the fault handling, the sensor may latch into a fault state, reset repeatedly, or start outputting garbage values. In many fielded systems, this is worse than a clean failure—the sensor appears alive but lies about the environment, leading to control decisions based on phantom inputs.
Reading Waveforms Without Losing the Leading Edge
Fast edges carry the real story, and losing them usually means losing the measurement. A 10 ns rise time can look like 20 ns if the front end bandlimits the signal before the ADC ever sees it. Matching probe bandwidth to the scope, keeping cable lengths short, and turning off any input filtering that isn't absolutely necessary all help preserve the sharp initial transition.
Trigger behavior is another quiet culprit. If the trigger comparator receives a heavily filtered version of the input, it may fire late or miss the edge entirely. Using a separate trigger path with fast hysteresis and setting the trigger level near the midpoint of the edge gives the acquisition engine a solid timing reference without rounding the waveform itself.
Grounding style matters more than most people expect. A long ground clip adds loop inductance that rings right on top of the leading edge, so the first few nanoseconds become impossible to read. Swapping to a short spring ground or a coaxial tip reduces that resonance dramatically. Once the connection is clean, dial in the timebase to show the pre-trigger region and avoid averaging until you've confirmed the raw edge shape.
Calibration Routines That Survive Field Conditions
Field calibration rarely happens under clean, stable conditions. Dust, temperature swings, vibration, and limited power all push standard laboratory procedures past their breaking point. A routine that survives these conditions typically starts by swapping fragile reference standards for rugged, compact alternatives: dry-block calibrators instead of liquid baths, handheld pressure sources with built-in gauges, or fixed-point cells that tolerate rough handling. The goal is to reduce the number of delicate components and make every step doable with gloved hands and a headlamp.
Another practical shift is to design calibration checks around drift rather than absolute accuracy. Instead of trying to hit a perfect zero or span in one pass, field technicians record the as-found values, make only the adjustments that matter for the measurement range in use, and leave the rest alone. This prevents over-tuning a sensor to one set of conditions and then watching it wander when the sun hits the enclosure. It also builds a useful history: repeated small offsets logged over weeks tell you more about real-world stability than a single lab-grade certification ever will.
Finally, surviving field conditions means accepting that the routine itself will be interrupted. Power may drop, weather may close in, or the process may need to finish after dark. A resilient calibration procedure stores partial results automatically, allows step-by-step resumption without restarting from zero, and includes quick pass/fail checks that catch gross errors before they waste an hour of work. The best field routines are not the most precise on paper—they are the ones that still get done correctly when everything around them is going wrong.
Choosing Isolation for 200 kA Transients
When a 200 kA transient hits a power bus, the choice of isolation is rarely about withstanding a single number. It's about how the barrier behaves as the pulse climbs, saturates, and decays. Magnetic cores in current transformers or Hall-effect sensors begin to show nonlinear permeability well below peak current, which means the isolation's effective impedance shifts during the event. Selecting a material that stays linear through the first 50 microseconds often matters more than the headline surge rating.
Mechanical layout becomes a hidden player. Creepage and clearance distances that look generous on a datasheet can collapse under conductive dust, humidity, or conformal coating stress. For 200 kA transients, partial discharge at material interfaces is another failure path that static tests miss. Designers increasingly rely on void-free potting and controlled impedance paths rather than simply increasing spacing.
Testing also needs to mirror the real waveform. An 8/20 µs impulse is common, but a 200 kA transient in a rail or industrial setting often carries a faster rise and a longer tail. That changes where energy gets deposited inside the isolation barrier. Characterising the barrier with a bi-exponential pulse that matches the site's fault signature reveals weak points that standard compliance waveforms can hide.
Mounting Practices That Prevent Ground Loops
Ground loops usually start with mounting decisions, not just wiring. When a PCB or metal chassis component is bolted directly to an enclosure at multiple points, the mounting hardware can become part of the return current path. One fix is to isolate signal-carrying boards from the chassis using nylon standoffs or shoulder washers, then create a single deliberate chassis connection near the power input. This keeps return currents from wandering through the metalwork and forming loops.
Another useful habit is to avoid relying on mounting screws as grounding conductors. Screws loosen, oxidize, and vary in contact pressure, which turns them into unstable low-impedance paths. Instead, run a dedicated ground wire or braid from the circuit board to the chassis at exactly one point. If a board must be mounted flush for thermal reasons, use a thin insulating pad or anodized coating, and verify with a multimeter that the mounting holes are not electrically common with the chassis.
For stacked assemblies or rack-mounted gear, watch the path between connector shells and the front panel. A connector bolted to a painted or anodized panel may not make a solid ground, forcing return current to seek another route. Scratch away the finish around the connector opening or use a serrated washer to bite through the coating. Then break any potential loop by leaving one end of the cable shield floating or using a low-value resistor in series with the shield drain at the receiving end only.
When to Replace Rather Than Repair a Sensor
A sensor that repeatedly drifts out of calibration despite multiple adjustment attempts is often telling you its internal reference has degraded beyond recovery. You can keep tweaking the zero point or span, but if the output wanders again within days or even hours, the sensing element itself has likely lost structural stability. Repairing such a unit only postpones the inevitable, and in process-critical environments that delay can translate into unsafe conditions or costly batch rejections. At that stage, replacement is not just more practical—it is the only responsible choice.
Physical damage that compromises the protective housing or sealing also pushes replacement ahead of repair. A cracked ceramic diaphragm, a swollen O-ring, or moisture ingress into the electronics cavity creates failure modes that no amount of bench work can fully reverse. Even if the sensor appears to function after drying and cleaning, hidden corrosion or micro-fractures will resurface under pressure or temperature cycling. For sensors exposed to aggressive chemicals or abrasive slurries, the outer materials may have already thinned or embrittled, making any “fixed” sensor a liability waiting to fail.
Finally, consider the economics of your own time. A sensor that is cheap to buy but takes four hours to disassemble, diagnose, recalibrate, and reinstall may cost more in labor than a brand-new unit—especially if the repair only restores partial accuracy or shortens remaining lifespan. When a replacement sensor costs less than the labor and downtime required for a repair, or when the repaired sensor cannot meet the original accuracy and response-time specifications, swapping it out is the smarter move. That is not wasteful; it is recognizing that some components reach a point where their service life has simply ended.
FAQ
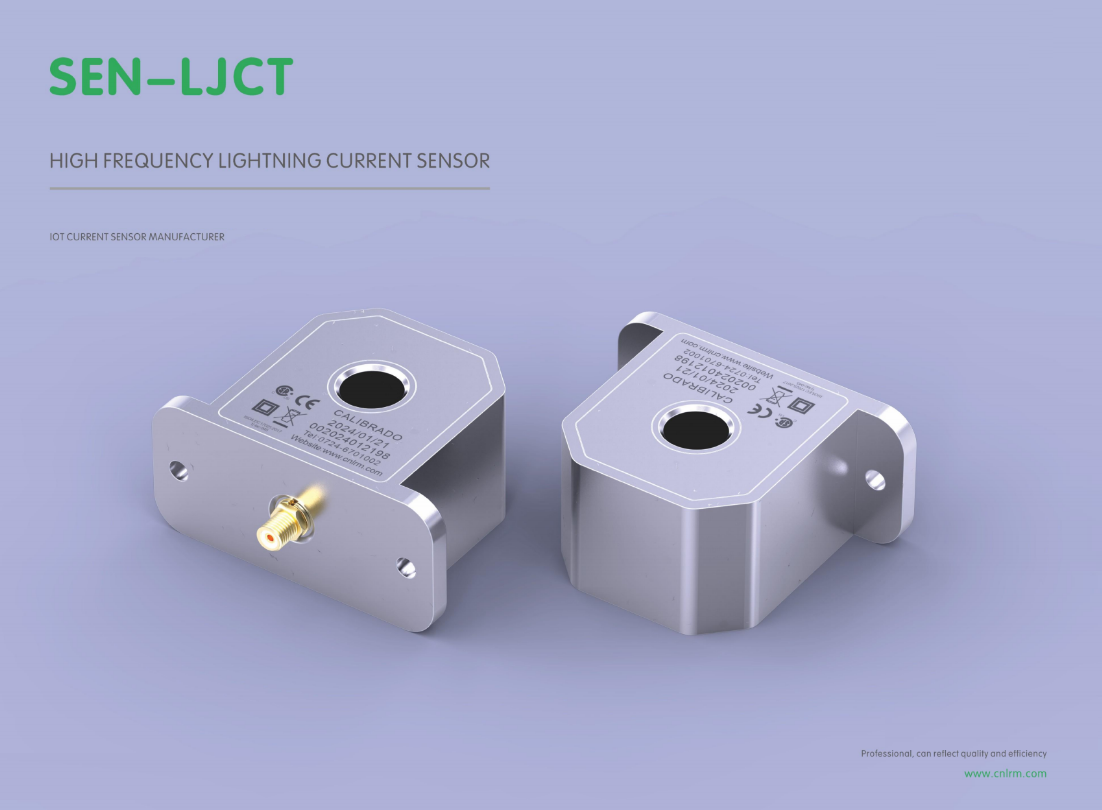
It captures the amplitude and waveform of transient currents produced by lightning strikes, typically in the kiloampere range, and converts them into a proportional low-level signal for monitoring or protection systems. Rather than just flagging that a strike happened, a well-designed sensor preserves the fast rise time and decay shape so engineers can assess severity.
Original manufacturers control the full production chain, from Rogowski coil winding to calibration, so there is no guessing about material substitutions or undocumented design changes. That continuity matters because lightning sensors must survive extreme electromagnetic interference while staying accurate; third-party clones often cut corners on shielding, insulation, or temperature compensation.
Each sensor should undergo impulse testing with calibrated surge generators, not just static continuity checks. A reliable manufacturer will test against waveforms like 8/20 µs and 10/350 µs, verify linearity across current ranges, and record the response curve. Some also perform partial discharge testing to confirm insulation integrity under high voltage.
Mounting the sensor near high-current conductors from other phases, using the wrong orientation, or adding extra wire loops can introduce stray coupling and distort readings. The sensor needs a rigid, non-ferromagnetic mounting point, proper clearance from return conductors, and a low-impedance grounding path for the shield. Even small gaps or loose clamps can cause ringing on fast transients.
Yes, if the housing and potting are designed for UV, moisture, and thermal cycling. Original manufacturers often use sealed, non-corrosive enclosures with stable magnetic cores and minimal drift electronics. Field recalibration intervals depend on exposure, but many units remain within tolerance for five years or more when installed correctly. It is wise to compare against a reference during annual maintenance if the site has frequent direct strikes.
Most offer a voltage output proportional to di/dt or a direct current waveform via an integrator. Some include both: a fast di/dt output for recording rise time and an integrated output for peak current and charge transfer. Fiber-optic isolation is becoming common because copper signal cables can pick up induced transients and corrupt the measurement.
Start by assessing exposure: a tall tower or exposed substation may see 200 kA or more, while a low building rarely exceeds 100 kA. Choose a sensor with a linear range at least 20% above the expected maximum, and check that the lower detection threshold is still sensitive enough for distant strikes. Oversizing too much can hide smaller events; undersizing risks saturation and permanent damage.
Lightning strikes generate intense electric and magnetic fields, so the sensor body and signal cables must be shielded against both. Double shielding with a non-magnetic outer layer works well, and connection boxes should have surge-rated terminals. Without proper shielding, the sensor may record the electromagnetic pulse from a nearby strike as a false current, leading to incorrect event counts or protection actions.
Conclusion
A direct strike doesn't just overwhelm the input stage—it forces every downstream component to respond to a waveform that changes faster than many digitizers can capture. The original manufacturer's guide treats the leading edge as the most fragile part of the measurement: any front-end filtering or slow sampling will clip the initial rise, leaving you blind to the peak current and rate-of-change that actually determine damage. Field calibration therefore needs more than a benchtop check. It has to verify the sensor's response under fast transient conditions and account for connector wear, cable aging, and temperature drift. The guide recommends periodic pulse injection with a known low-inductance source rather than relying on static resistance or software-only corrections.
Isolation for 200 kA transients is not a single component choice; it requires coordinated creepage, clearance, and galvanic separation rated for the full waveform energy, not just the peak. Mounting matters just as much—improper grounding paths between the sensor body and the measurement system create loops that couple induced noise into the signal, especially when the strike is nearby. The guide specifies direct bonding to a single-point ground and insulated mounting hardware where possible. Finally, not every sensor comes back from a severe event. If the housing shows carbon tracking, the output offset shifts irreversibly, or the calibration cannot hold after two consecutive adjustments, replacement is cheaper and safer than trying to patch a device whose internal insulation has already been compromised.
Contact Us
Contact Person: Liu Mengyang
Email: [email protected]
Tel/WhatsApp: 8618727589233
Website: https://www.cnlrm.com/en/